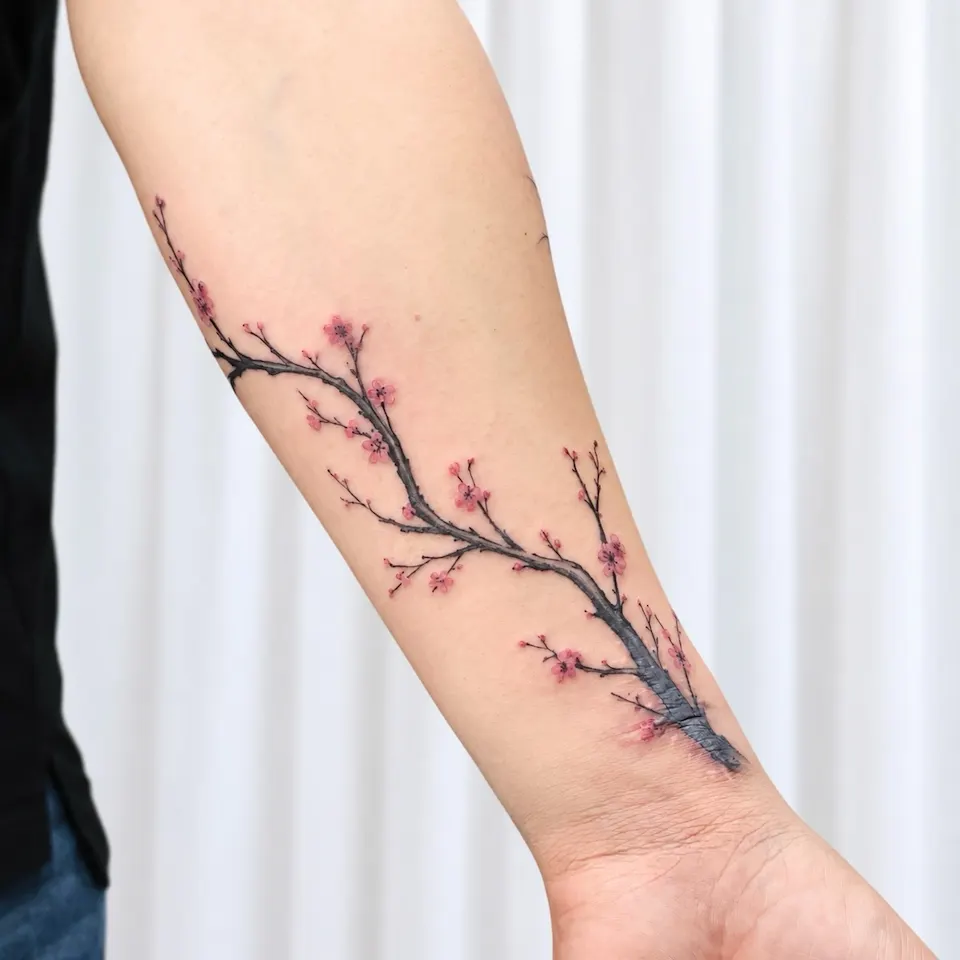
Where did this plum blossom branch start, and how far up the arm does it run?
Hi, I'm Yeonjae, a tattoo artist in Hongdae, Seoul.
Today I'd like to share a plum blossom tattoo I did recently. If you want a branch running from the wrist up the forearm but can't picture where it should start or end, and that has kept you from booking a Hongdae tattoo consultation, this piece is a good place to begin.
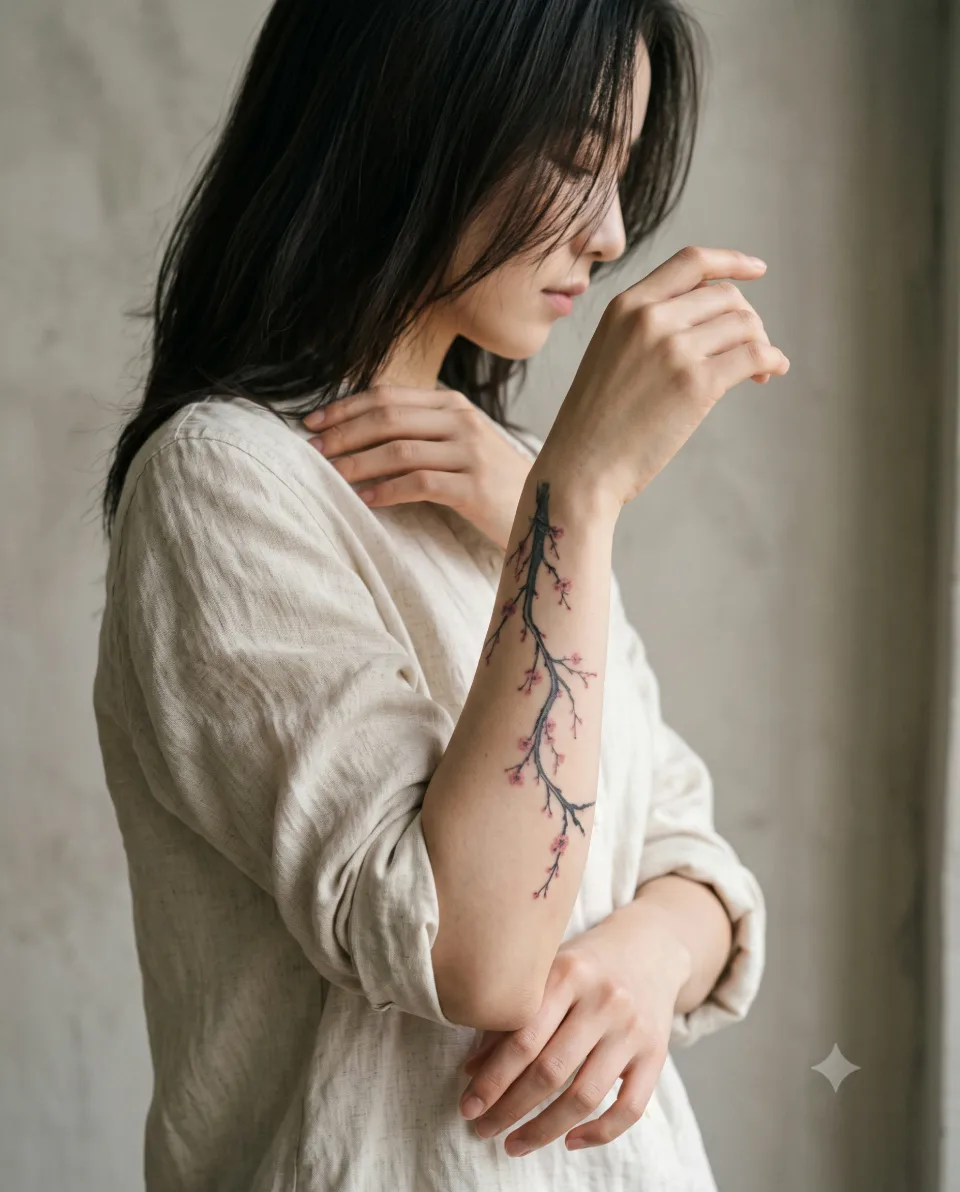
The first photo shows a plum blossom branch that starts as a thick black trunk close to the wrist and rises diagonally along the forearm. It thins and splits as it climbs, pink blossoms of different sizes sit along it, and the tip turns toward the side of the arm. In the original post I wrote that the branch was designed to gently cover the scar around the wrist and that it follows the natural flow of the arm.
Start the trunk thick at the wrist, let it rise in the direction of the arm, and scatter blossoms of different sizes along the branch, and the flow of the arm reads naturally. Below I go through how that showed up in each photo. Take your time asking about price and session length in the consultation.
How are the branch and blossoms placed in the other photos and similar pieces?
Photos 2 and 3 belong to the same plum blossom piece, and photos 4 and 5 are different pieces I chose on a similar theme. Here is what you can see in each, together with what the posts say.
| Photo | What you can see | What the post says |
|---|---|---|
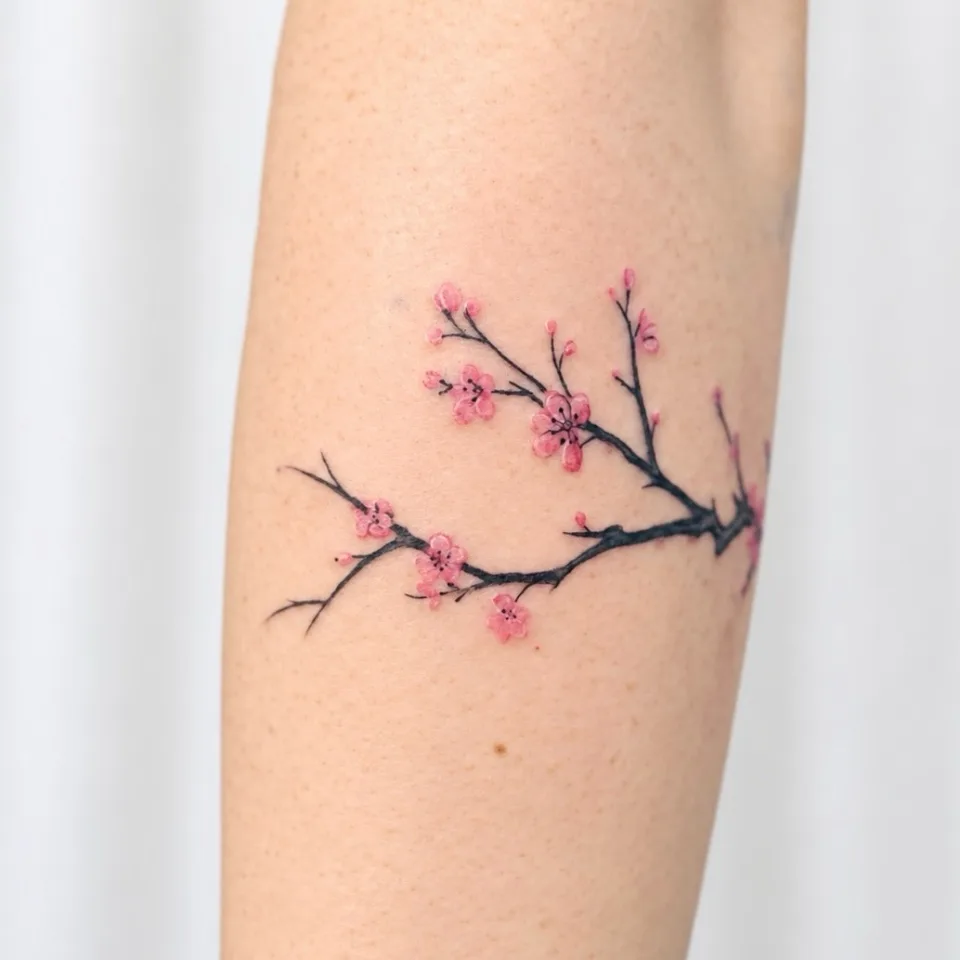
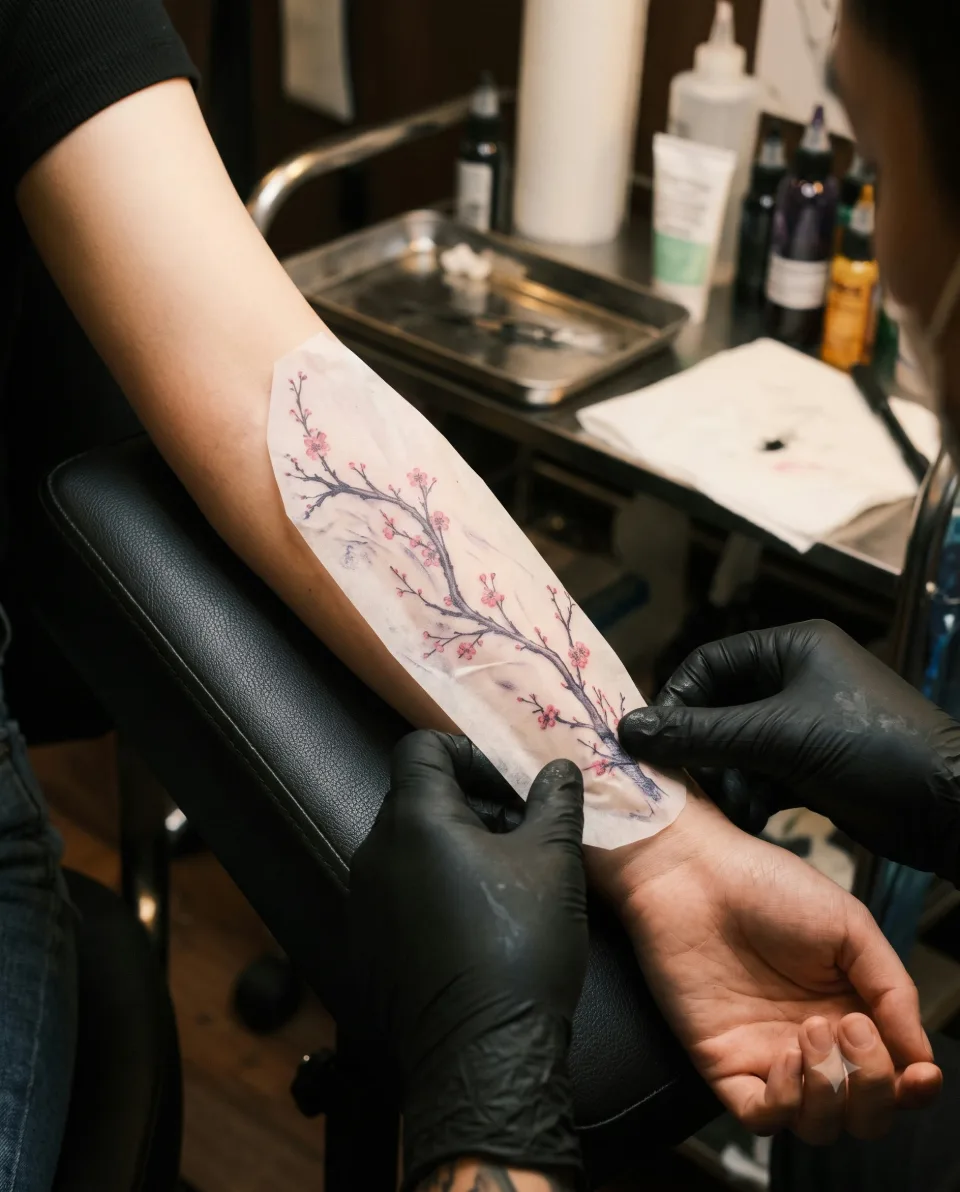
| 2 | A close-up of the middle of the forearm. The branch crosses the arm and turns toward its side, with large and small blossoms and buds along it | Same post as photo 1: the branch follows the natural flow of the arm, and soft pink blossoms add a delicate, graceful touch |
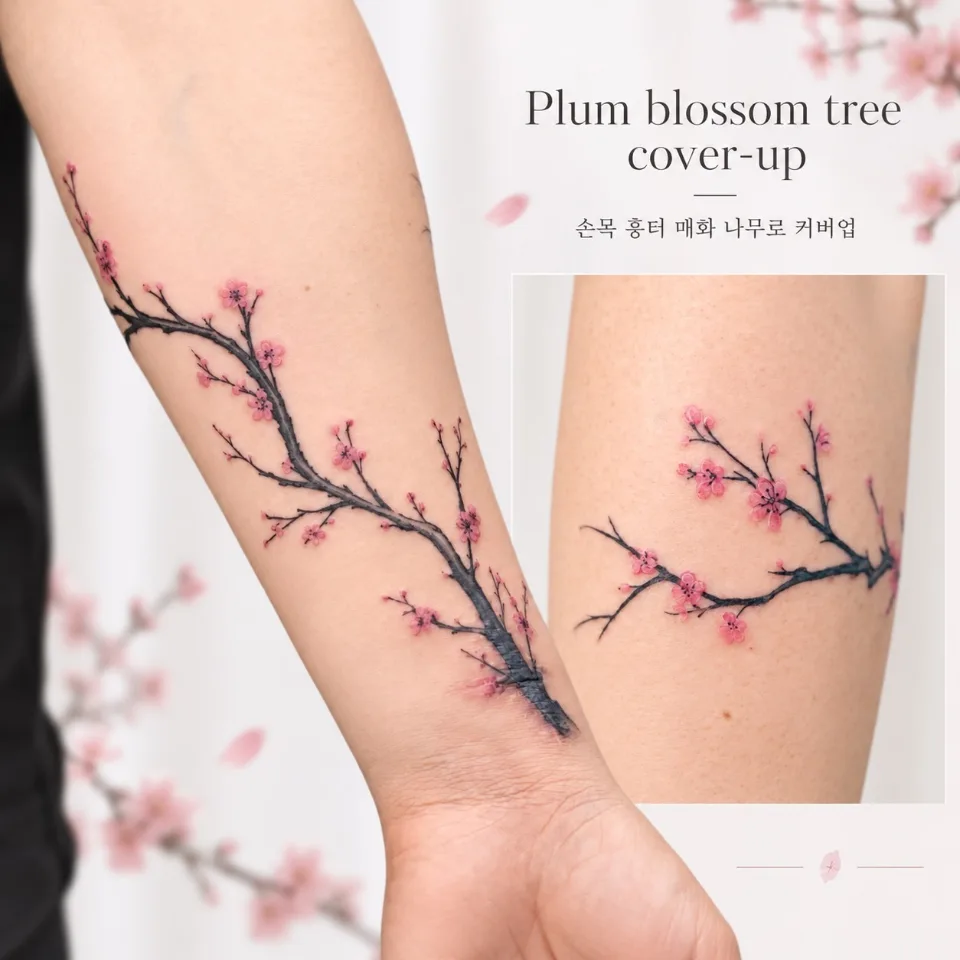
| 3 | A composite with English text "Plum blossom tree cover-up" and a Korean caption laid over the photo, with a close-up of the forearm inset on the right | An announcement graphic, not a photo from a tattoo session |
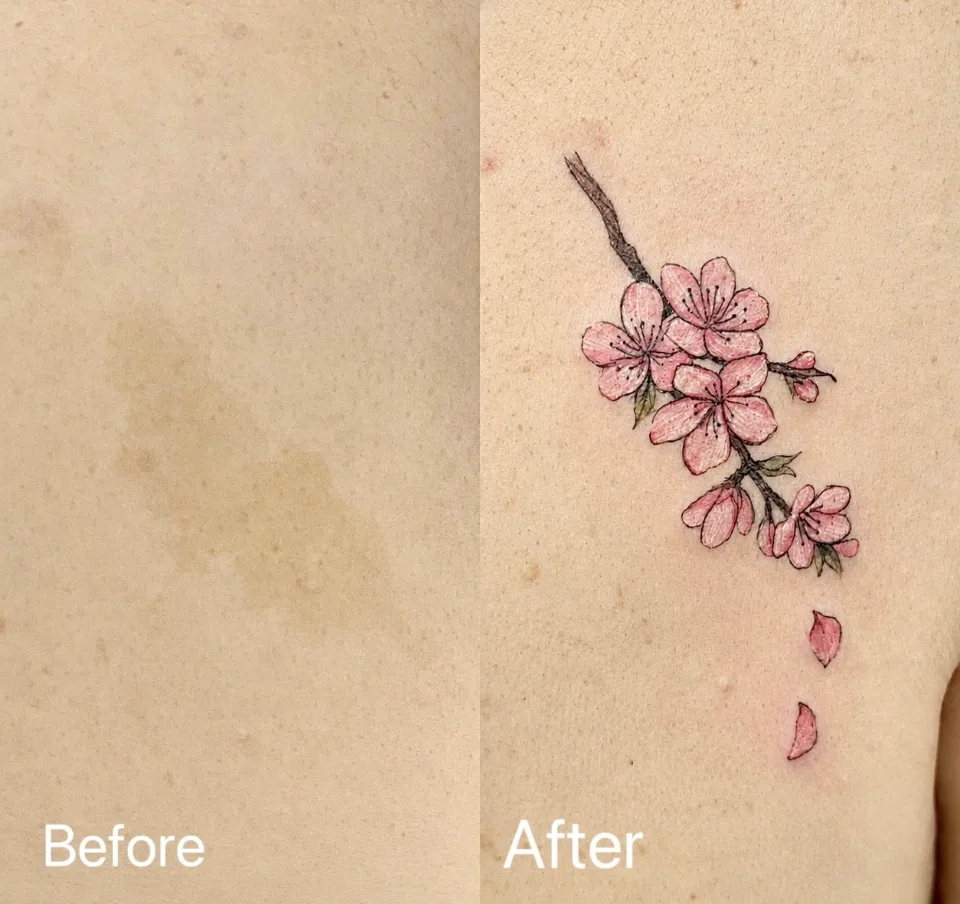
| 4 | A different piece on a similar theme: a before-and-after where a light brown patch on the back has a pink cherry blossom branch and two falling petals in the same spot | Made to gently cover a light brown pigmentation mark on the back, with the blossoms and petals arranged according to the shape and colour of the mark |
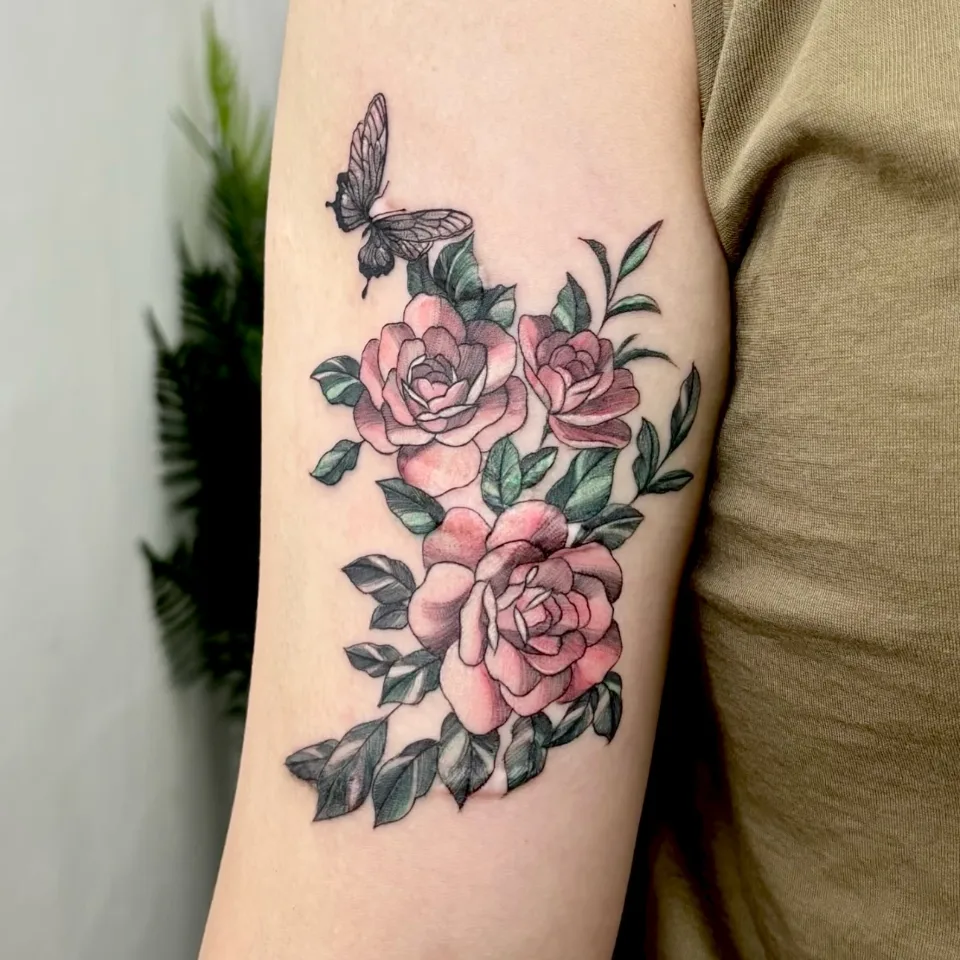
| 5 | A different piece on a similar theme: three pink roses with green and black leaves on the upper arm and a black butterfly above | Not a result of the plum blossom piece; it is separate work |
Photo 2 is taken up close, so the difference in blossom size is easy to see. Small flowers and unopened buds sit beside the larger ones, and the tips of the branch thin out as they turn toward the side. Photo 3 places the work from photo 1 on a large canvas and adds a close-up of the forearm beside it, so you can see the flow of the whole arm and the detail in one frame.
Photos 4 and 5 place flowers in a different way from a long branch. Photo 4 gathers a cluster of blossoms on a short branch with petals falling below, and photo 5 gathers flowers and leaves into one mass over the curve of the upper arm.
Why did a start at the wrist and a diagonal direction suit this branch?
Four decisions stand out in the photos.
- Starting point: The thickest trunk sits near the wrist. With the heaviest line at the bottom, a branch that gets finer as it rises reads as stable.
- Direction: The trunk rises diagonally along the length of the arm, which matches the post's description of following the natural flow of the arm.
- Blossom size and spacing: A pink blossom sits right beside where the trunk begins, and the upper branches carry blossoms and buds of different sizes. They are not crowded in one spot, so the eye travels along the branch.
- Colour and open space: It is a restrained scheme of a black branch with pink blossoms only, with generous skin left between branch and flowers.
Grouped by position, it looks like this.
| Position | Photos | What you can see |
|---|---|---|
| Near the wrist | 1, 3 | A thick black trunk begins, with a pink blossom beside it |
| Middle of the forearm | 1, 2 | The trunk rises diagonally or crosses the arm, thinning as it splits |
| Upper end of the forearm | 1, 3 | The twigs get finer and the tip turns toward the side of the arm |
| Upper arm (a different piece on a similar theme) | 5 | Flowers gathered into one mass over the curve of the arm |
With a branch tattoo, the direction it flows across the arm reads before the drawing itself does. This piece looks as though the path of the branch from the wrist was set first and the blossoms were laid along it. When you look from the front, it is worth checking together in the consultation where the branch seems to stop and how it turns around the side.
In what order should you decide branch direction and blossom placement?
Once the direction is settled, people often ask about the starting point and the amount of blossom. Thinking through the five points below in order makes a consultation much easier before you choose a design.
- Starting point: Whether the branch starts at the wrist or in the middle of the forearm changes the impression when your arm hangs down. In photo 1 it starts close to the wrist.
- Direction: Photo 1 rises diagonally along the length of the arm, while photo 2 crosses the arm and turns to the side. Tell me whether you want a long flowing line or one shorter stretch that wraps the arm.
- Branching: The more twigs split off the trunk, the busier it looks; the fewer, the cleaner the line. In photo 1 the twigs multiply toward the top.
- Groups of blossoms: Decide whether blossoms gather in one place or sit here and there along the branch as in photos 1 and 2. A gathered spot becomes the focal point.
- Open space: Visible skin between branch and blossoms keeps the arm from feeling crowded. Photo 2 leaves generous space.
Picture the arm in motion too. A branch that crosses the arm, as in photo 2, can look bent when you flex your arm, so I suggest bending your arm in front of a mirror. Work out with your usual clothes how much stays covered in long sleeves and how much shows in short sleeves, and tell us where a watch, bracelet or bag strap sits.
Photo 5 is a different piece on a similar theme. Unlike a branch that runs long, the flowers are gathered into one cluster over the curve of the upper arm, which makes it a useful comparison when you are weighing a long branch against a gathered cluster. It is not a result of the plum blossom piece, though; it is separate work.
If you are curious about designs where direction is read first, take a look at our sword tattoo post too. The thinking behind choosing a vertical forearm or a diagonal collarbone line carries over to a branch tattoo.
How do you set the area to cover when you want to build on what is already near the wrist?
Many people come to me wanting a new design over an existing mark or tattoo around the wrist. I describe this kind of work not as erasing what is there but as keeping that place and laying a new design over it. How much is covered depends on your skin and the design, so I can't promise anything from a photo alone.
Photo 4 shows the same idea. On the left (Before) there is a light brown patch on the back; on the right (After) a pink cherry blossom branch and two falling petals sit in the same spot. The post says the blossoms and petals were arranged by looking at the shape and colour of the mark. The body part differs from the plum blossom piece, but the thinking is the same: placing the design to suit the shape of the mark.
When we decide the area to cover in the consultation, we look at these points together.
- Position and shape of the spot: where the trunk should sit so the eye flows naturally.
- How far the branch runs: only around that spot, or up the forearm as in photo 1.
- Where the blossoms go: where to gather them along the branch so attention is not scattered.
Refining an existing tattoo or mark and switching to a new design are different approaches, so I first work out from your photo which one fits. If you'd like to read on, our small tattoo retouch and cover-up post follows this with wrist and hand photos.
Aftercare depends on your skin, the placement and the size of the design, so I won't state one general method here. Feel free to ask in the consultation, "How will I be guided on aftercare?" The wrist moves a lot, so knowing the guidance before you begin is more reassuring.
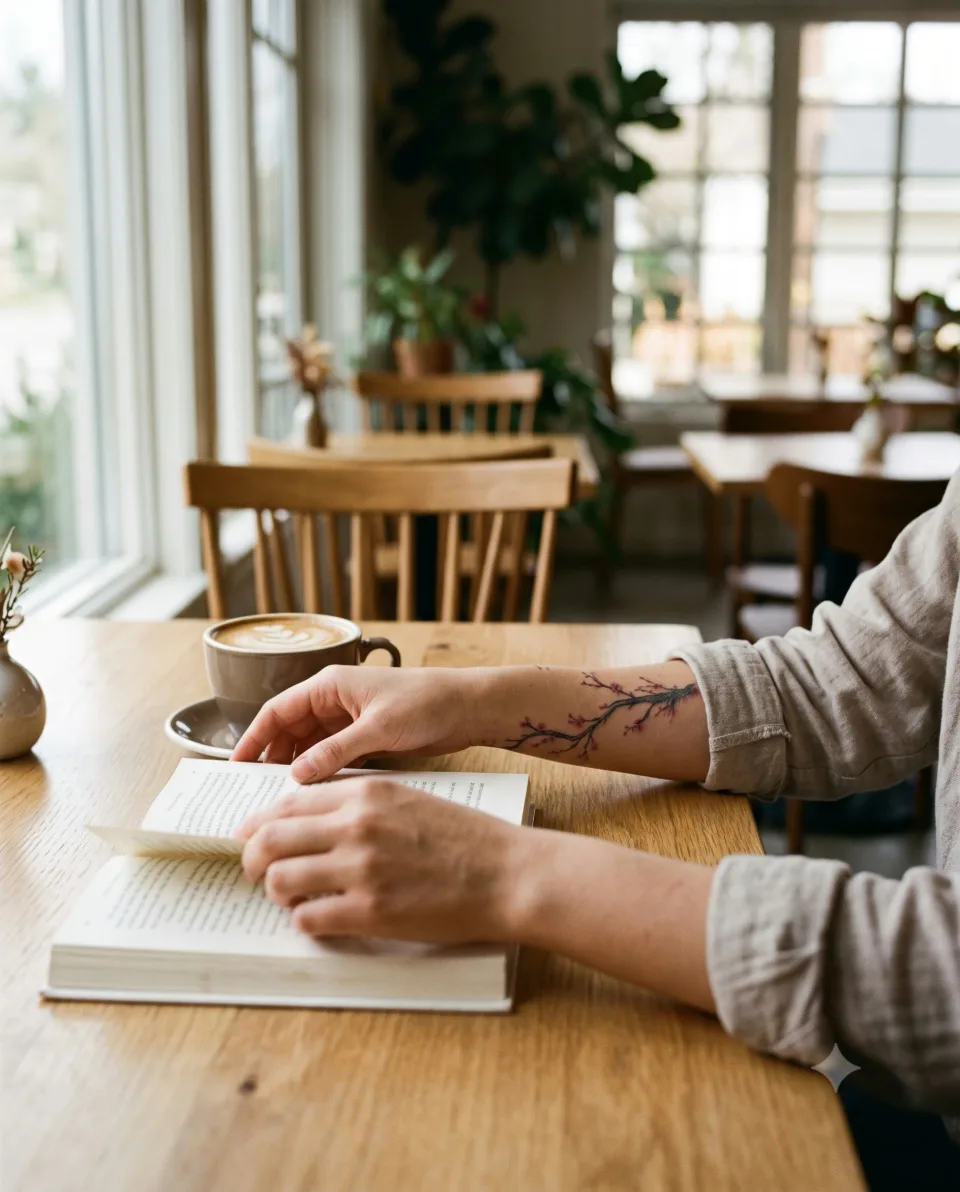
Picture reading in a cafe or walking outside and rolling your sleeve up so that a thin branch just shows, and think ahead about how much you'd like to be visible day to day.
What should you prepare before the consultation? (checklist)
Keep it simple. If you collect these six things on your phone, the consultation goes much faster.
- A close-up of the area you want to cover: in natural light, one from the front and one from the side. If there is a mark, show its shape.
- A photo of the whole arm: with your arm relaxed, from the wrist to the upper forearm in one frame. It helps us judge which way the branch can go.
- A photo of any existing tattoo: if it is close to the branch or overlaps it, we need to see its position.
- The feel of branch you like: one long flowing line as in photo 1, or one stretch wrapping the arm as in photo 2.
- The amount and colour of blossoms: many pink blossoms gathered, or a plainer branch-led look.
- Your usual watch or bracelet and sleeve length: the wrist is often covered or shown, so it helps when we decide the position.
How much is covered and what is possible are not decided from a photo alone; we decide in an individual consultation after seeing your skin as it is now.
How do you start a consultation by Instagram DM?
It's easy. Follow the steps below and you're set.
- Open an Instagram DM to @yeonjae_tattoo. Open the Instagram DM
- Send the photo of the area you want to cover, a photo of the whole arm, and the mood of branch and blossom you like from the checklist above. Whatever you've already worked out is enough.
- After we see your photos, we talk through branch direction, amount of blossom and coverage in an individual consultation. We also give price and session length during that consultation.
The design does not have to be finished. Send the mood of a branch you like first. If you're looking for a Seoul tattoo studio and want a feel for our other work, you can also browse our films page.
Let’s talk about a tattoo that feels like you
Bring reference photos and tell us your preferred motif, size and placement.
Who is the tattoo artist behind this article?
I'm Yeonjae, a China Academy of Art graduate who has been tattooing in Hongdae for eight years as of 2026. The academy is an art school founded in Hangzhou in 1928, and I try to bring what I learned there into the thickness of a branch line, the colour of a blossom and the balance on the arm.
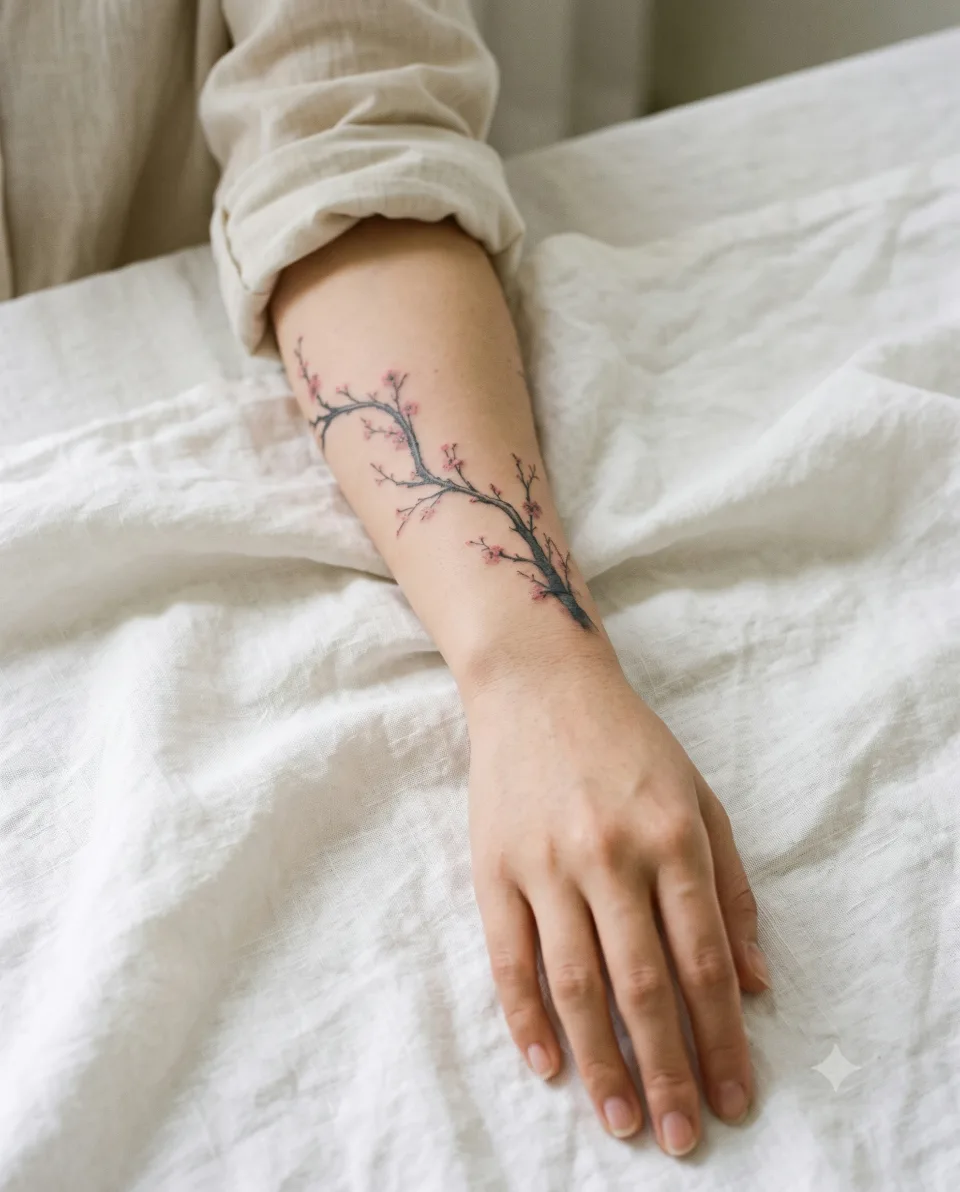
This article is based on the plum blossom branch post on the Yeonjae Tattoo Instagram account, two pieces I chose on a similar theme, and five photos I opened and checked myself. I only carried over the feelings behind a design as far as the post's description goes, and I have not interpreted the text in the photos. The four AI-staged images in the article were made to help you picture a consultation, and they are not real clients or actual tattooing scenes.
Before you book
Which photos should I send first for a plum blossom branch consultation?
Send a close-up of the area you want to cover and a photo that shows the whole arm by Instagram DM. If you already like a certain feel of branch, mention it as well and things will move faster.
Does the branch have to start at the wrist?
In photo 1 it starts close to the wrist and rises along the forearm. The starting point depends on the area you want to cover and your usual sleeve length, so we decide it together after seeing your arm photo.
How are the blossoms placed along the branch?
In photos 1 and 2, blossoms of different sizes sit here and there along the branch. Whether to gather them or spread them out depends on the mood you want and your arm photo, and is decided in the consultation.
How much of a mark near the wrist can be covered?
It depends on your skin and the design, so I cannot state it in an article. If you show us how it looks now, we can talk about what composition is possible in an individual consultation.
How can I find out about price and session length?
They depend on the length of the branch, the amount of blossom and the placement, so this article does not state them. Write to us on Instagram and we will explain them in an individual consultation.
Key facts
- Location
- 2F, G Studio, 136-11 Eoulmadang-ro, Mapo-gu, Seoul, South Korea
- Opening hours
- Mon–Sat 11:00–23:00 · Closed on Sundays
- Artist
- Yeonjae · China Academy of Art graduate · eighth year in Hongdae (as of 2026)
- Styles
- Fine line · Floral & botanical · Cover-up
- Consultation & booking
- Confirmed after consultation via Instagram DM, LINE or KakaoTalk
- Pricing & time
- Price and session length depend on the design, size and placement, and are explained during the consultation.
China Academy of Art graduate, in her eighth year as a tattoo artist in Hongdae · as of 2026
China Academy of Art is an art university founded in Hangzhou in 1928. Its long history of art education provides context for Yeonjae’s fine-art background. About the academy · official website ↗
Yeonjae Tattoo · Blog
This post brings together the work photographs, published descriptions and guidance for preparing an inquiry. See the artist profile above for the creator’s background.
Photo source: Original artwork & context ↗
Original Instagram caption
Based on the artist’s supplied work notes. Editorial text was prepared with AI assistance.